Showing posts with label recipes. Show all posts

Tuesday, December 2, 2008

My Thanksgiving weekend...

In a word: rough.

Here's a summary of what went down:

- Felt a little handicapped by two new recipes for the mashed potatoes and stuffing/dressing (the previous recipes I could do with my eyes closed).
- Was completely confounded by a new turkey-trussing method, which, ironically, was Alton Brown's. Every year, I forget how to truss turkey (I guess I need to make whole poultry dishes more often), so I look up the same instructional video on Food Network -- except I couldn't find it this year. Aren't you supposed to be making this easier for me, Alton, instead of delaying my turkey from getting into the oven by half an hour?
- Took out the turkey too early because I am apparently unable to properly use a thermometer. I just could not get in sync with my turkey this year! My stuffing and sweet potatoes were taking up space in the oven by the time I realized that my bird was a few degrees away from saying "GOBBLE," so I had my sister make a frantic run to my aunt's house where Thanksgiving is hosted (luckily only 3 minutes away) with the turkey in the passenger seat, while my car was beeping incessantly warning her to buckle in her 20-pound turkey child.
- Made a mess in the oven by forgetting to place my springform pan, containing my post-Thanksgiving pumpkin cheesecake, on top of a sheet pan. I felt really bad about it because my mother had just made the oven all spic and span when she cleaned up the turkey splatters. After that, I cleaned it up myself of course, but not without forgetting to use kitchen gloves. So now I have a scaly monster for a right hand.
- Finally: contracted a really, really annoying cold/cough.

BUT. Despite all the mishaps, Thanksgiving was a success. After we cooked it all the way through at my aunt's, the turkey was still super tender and tasty. The two new recipes -- caramelized shallot and sage mashed potatoes and hazelnut, sage, and mushroom stuffing -- were well worth the extra effort. I added a little oomph to my turkey stock this year, resulting in a superbly rich gravy.

I just hope next year's Thanksgiving runs a tad more smoothly.

Now, please join me as I look back on reaping the rewards of a rough weekend!


Counter-clockwise from top left: my mom's salad with peanut dressing -- a staple at any family party (oh, forgot to mention that we always have American + Indonesian food at Thanksgiving), BBQ chicken, mac 'n cheese, corn spoonbread, baked sweet potatoes and apples, turkey turkey, Honeybaked ham, creamed spinach and corn (a dish I'm retiring to the dismay of a beloved cousin), fried bakmi, Oma's bakso soup, krupuk, stuffing, mashed potatoes, gravy and cranberries. I only made seven of these dishes.


The stuffing was among my favorites this year. I used a Pullman loaf from Poul's Bakery in Orange instead of a box of dried bread cubes. I'm definitely not opposed to shortcuts, but using real bread is WORTH it. The creminis are great, and the hazelnuts make it so festive!


Aaaand this is why I love having a pastry chef for a cousin.


YES that is a mini crème brulée next to the mini fruit tart, pumpkin pie, pecan pie and brownie!


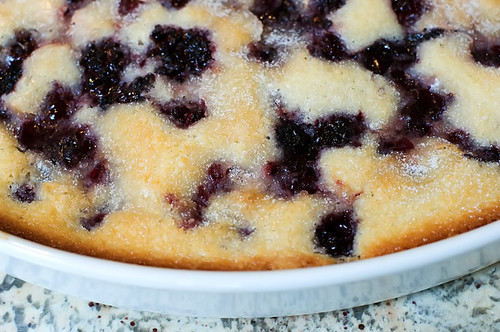
A pretty good first attempt at making cheesecake, if I do say so myself. The crust is made from gingersnaps, pecans and candied ginger; the topping is sour cream and marshmallow. All of it is creamy, dreamy and wonderful.

Thanksgiving is still my favorite holiday.

Tuesday, November 25, 2008

Buttercup and pumpkin.

Yes! I'm squeezing in at least one more post before Thanksgiving.

Buttercup squash is similar to kabocha, although the texture is more starchy and the flavor is less rich, in my opinion.


I just baked it, scooped out the flesh, and topped it with cinnamon, brown sugar, and walnuts. And then I baked it again.

It was not my favorite. It would probably be better suited in a stew. At least its funky appearance provided some amusement.


As for the pumpkin.... I cheated and used canned. (I am reserving my actual sugar pumpkins for something more exciting.)

But this chocolate pumpkin tart still counts, right?


The fresh whipped cream and pecans are essential. This tart recipe was super easy, but I should have lined the bottom with parchment. The bottom of the pan pops up from the sides, but the melted chocolate + caramelized sugar cemented parts of the tart onto the pan. I hate fighting with my food.

But we kissed and made up.

Next: My butternut debacle. (P.S. Take the poll if you haven't already!)

Thursday, November 13, 2008

Kabocha.

Yeah, so, I haven't really been following the schedule o' squash as well as I had intended. But I have started!

First up: Kabocha squash.


Kabocha is a Japanese pumpkin and its flavor and texture, according to Wikipedia, is comparable to chestnuts. I'd have to say I agree.

It's commonly used in tempura. Mmm. That's what I love about squash: its versatility in creating both sweet and savory dishes. The following recipe is an example of the latter execution.

Miso-glazed kabocha squash:


(I'm annoyed because my camera battery died before I could upload my own photos, and I don't have my memory card reader with me. But blah di blah di blah, you probably don't care.)

This recipe from Sunset Magazine was a good first one to try, although when I make it again, I'll probably cut slightly thicker slices, to be able to savor more squash per bite. Also, I over-glazed them; saltiness hampered the natural sweetness of the squash. Let the taste of nature's bounty shine through! Power to the squash! .. And other hippie phrases.

More tips for my future self!
- Be patient when baking; semi-crunchy squash is not so yum.
- Don't leave out the sesame oil; it's a nice finishing touch.
- It's pretty tasty on a bed of steamed rice.
- The rind, while edible, gets annoying after a while.
- Kabocha is fun to say. Kaaboochaaa. Heh.

Yay, 1 down, several more to go (picture a butternut squash, a buttercup squash, and sugar pumpkins all lined up in a row on my counter).

Monday, March 17, 2008

Next stop: Indonesia (or Southeast Asia) for coco-pandan birthday cake.

One of my birthday presents to myself each year is the joy of making my own cake. Unfortunately, I was so bogged down with other obligations this year that I couldn't start my cake until the very last minute.

But I think I still worked it out:


This coco-pandan cake was actually still a blank canvas as party guests were arriving, and I finished decorating it with the help of my pastry chef cousin Irene while people were eating birthday brunch.

I was going to do some fancy piped shiz on it, but I was too lazy. Luckily, Nature gave me some lovely decorating tools: I took leftover kiwis originally intended for healthy snacking, sliced them ever-so-thinly (as I only had 3 left), strategically stuck them on my cake and patted myself on the back.

Of course, Irene showed me up by piping adorable chocolate embellishments all over it. As her former "bakery assistant" (I use the term loosely), I loved watching her work.

In fact, she gave me this recipe for coco-pandan cake. The cake is a simple chiffon with pandan flavoring, with fresh (actually, canned, but y'know, NOT dried/flaked) young coconut between the layers.


Coconut-Pandan Cake, courtesy pastry chef cousin Irene
8 oz cake flour
9 oz superfine sugar, divided
2 teaspoons baking powder
1 teaspoon salt
1 cup oil
1/2 cup water
Pure vanilla extract, to taste
20 egg yolks
10 egg whites
1 tablespoon pandan extract (recommended: Kupu-kupu brand)
Green food coloring, if needed

Sift together the flour, 8 oz of the sugar, baking powder and salt in a medium bowl. Set aside.

Combine oil, water, egg yolks and vanilla in a mixer fixed with the whip attachment. Mix on low speed until everything is incorporated. Add the flour mixture and whip on high speed until doubled in volume. Add the pandan extract. Add green food coloring for extra color, if needed.

While the flour mixture is mixing, add the remaining 1 oz sugar to the egg whites. Whip the whites until soft peaks form. Fold the whites into the flour mixture in 3 additions.

Divide the batter among two 10-inch round cake pans lined with parchment paper on the bottom. Bake at 350 degrees until tops are firm and golden brown and a toothpick inserted in the center comes out clean, about 20-ish minutes (unfortunately, I didn't time it).

"Fresh" Coconut Filling:
3 cans young coconut meat (recommended: Aroy-D brand)
Mochiko (sweet Japanese rice flour) to thicken
Sugar, as needed

Drain the coconut meat, reserving some of the juice. Chop the coconut meat into 1/2-inch pieces and place in a bowl. Add the Mochiko to the coconut, a tablespoon at a time, until the filling is a creamy, but not pasty consistency. Thin it out with the juice as needed, and add sugar if you want to sweeten it even more.

Right here I actually heated equal parts of Mochiko and coconut juice in a saucepan over low heat in order to dissolve the flour and make it less gritty before I added it to the coconut, but it's not entirely necessary.

Simple Icing:
2 cups heavy whipping cream
1/4 cup superfine sugar
1 teaspoon vanilla

Beat the whip cream and sugar in a large bowl on high speed until stiff peaks form. Beat in the vanilla toward the end.


I had originally planned to make coco-pandan cupcakes, but I couldn't figure out a way to translate the fresh coconut element to cupcake-form in time for my birthday. I'm still thinking about it.

Monday, March 10, 2008

Hey dontcha know that we're off to see the world.

Willkommen, Bienvenue, Welcome...

.. once again to my blog.

This month I will take on an "international theme." A majority of recent posts have been all about American comfort food, but it's true I love all types of cuisines. So this month, I will commit to blogging about non-American food. I realize this is quite an ambition for someone who blogs so sporadically. But! I will do my best.

To kick off this theme, I'd like to share a meal that was inspired by a film about excitement, intrigue, kick-ass songs, killer dance moves, and worldly adventures. A film that stands the test of time.

That's right, I'm talking about The Chipmunk Adventure.


Don't hate. You know this movie's awesome. And no, this isn't that blasphemous update starring Jason Lee.

Anyway, at one pivotal moment of the film, Theodore is husked away by the rest of the gang to have a crazy rock n' roll jumping dancing showdown thing with the Chipmunks' female counterparts and rivals, the Chipettes. Poor little Theodore, who hasn't been able to get some hearty eats the entire adventure and now has lost his delicious Mediterranean meal, desperately cries out,

"BUT MY COUSCOUS!"

And that was the inspiration for this dinner.

Lamb and Feta Burgers with Cumin Yogurt Dressing
, Bob Sloan, Great Burgers

Couscous Salad with Peas and Mint, Emily Haft Bloom, Burgers Every Way


A few alterations: I couldn't find ground lamb easily (although I imagine it would have been tasty), so I used ground beef, which was still excellent. And I used yellow peppers instead of red peppers for the couscous. Because I felt like it.

That night, we ate our couscous and watched fondly as Theodore scaled the steps of the Acropolis three at a time and enthusiastically gyrated his hips with his brothers.

Tuesday, February 19, 2008

A happy belated Valentine's Day.

My boyfriend luurrves me. Why?

This could be one reason:


Valentine's Day fell on a Thursday this year, so we waited until the weekend to celebrate. I decided to show my love for him by slow-cooking the shiz out of some beef. This smoky beef stew with blue cheese and chives had enough tender, fall-apart meaty goodness to ensure our future together. Hehe, kidding. Maybe.

For me, this recipe is one of those where you can't argue with any of the ingredients. To quote Sunset Magazine, "bacon, smoked paprika, and chipotle chile powder give this stew layers of smoky flavor." Red wine gives it depth (I used a Shiraz Cabernet), onions add sweetness... and who doesn't like buttery potatoes and carrots? To top it all off, tangy blue cheese slowly melts into the stew to complete a flavor masterpiece.

This recipe doesn't mess around.

Cornbread muffins were a perfectly sweet accompaniment to the salty smokiness of it all. It's teetering on the edge of my dish and contemplating a skinny dipping.


DO IT. JUUMMMP.

By the way, Trader Joe's Cornbread Mix (complete with real corn kernels!) is awesome. Of course, I added even more corn and then sprinkled the tops of my muffins with sugar. I couldn't help it. I love corn and sugar.

Oh, and I didn't forget about dessert: peanut butter and chocolate fondue, with apples, bananas, pretzels and strawberries.


Yes, I garnished it with sprinkles shaped like lips. And what.

Monday, February 11, 2008

Avocado makes a better dessert.


+


+


=


YUMZERS.

I'm sure this has an official Indonesian name (maybe just es alpokat?), but I call it avocado soup. Mother whips up this delicious coffee-flavored avocado dessert for me using just fresh scoops of avocado, ABC brand Mocca Syrup, crushed ice and a touch of water.

Actually, she makes it for herself, and then I steal it.

Guac is great and all, but the buttery avocado just.. belongs in dessert.

Monday, January 14, 2008

Glorious mac and cheese, please.

Well, I guess January is turning into a retro food month.

This weekend was all about mac and cheese. And I'm not talking about Kraft's neon-orange cheese powder. I'm talking gloriously baked, creamy and buttery, breadcrumb-topped, three-cheese, bacon-mushroom-chicken mac and cheese.


Let me back-track a bit.

Recently, I made my first trip to Yard House, and was pleased to confirm that the food's good, and the alcohol's great. And I totally dig the classic rock tunes. I love eating, drinking and being merry while listening to the Stones and Zeppelin! ... But that's probably for another kind of blog.

Anyway, my first-ever Yard House dish choice was the (Mac and Cheese)^2. Kind of a boring selection, I know, but I felt like something hearty and comforting: "roasted chicken breast, applewood smoked bacon, wild mushrooms, cheddar and parmesan cheese with castellane pasta and white truffle oil."

And I'd thought about that $16 mac and cheese ever since.

So here's my Yard House-inspired grown-up macaroni and cheese recipe. Except I don't use white truffle oil -- I was all out, of course. Silly me. But I did decide to throw in Gorgonzola for an added kick. Take that, Yard House! (It's like that one time I totally one-upped Rachael Ray's chicken cordon bleu burgers by using prosciutto instead of ham and Gruyère instead of regular ol' Swiss.)

Glorious Baked Macaroni and Cheese, courtesy Yours Truly, with a little inspiration from Yard House and a little help from Williams Sonoma (which provided the foundation for this recipe)

1 lb elbow macaroni, cavatappi, cellantani, or other tubular pasta
6 tablespoons unsalted butter
1/4 cup all-purpose flour
3 cups milk, heated
8 ounces sharp cheddar cheese, grated
8 ounces Monterey Jack cheese, grated
4-6 ounces Gorgonzola cheese (or other blue variety), crumbled
1 can chicken breast, or roasted (real) chicken breast, sliced
Salt, freshly ground black pepper, cayenne pepper, to taste
1 cup FRESH* sourdough breadcrumbs
10 slices bacon
Cremini mushrooms, as much or as little as you like, quartered

Fill a large pot with water and set it over high heat. Boil the pasta to slightly underdone (it will cook more in the oven); drain. Preheat the oven to 350 degrees F.

As you're waiting for the water to boil and the pasta to cook, be productive! Heat the milk in a medium saucepan over medium heat until barely simmering; remove from heat and set aside. Process cubes of crusty sourdough bread (if it's a day old, it'll make it easier on you) -- go ahead and process the crusts, too -- until you have a cup of breadcrumbs. Set aside.

* Yes, I highly recommend using freshly made breadcrumbs -- they will give a crunchier, yummier texture than store-bought breadcrumbs.

Start your roux: Melt 4 tablespoons of the butter in a large saucepan over medium heat. Add the flour; whisk to incorporate into the butter. Cook 1-2 minutes without over-browning. Add the milk and whisk to combine. Bring to a boil; remove from heat.

Add the cheddar and Monterey Jack cheeses a large handful at a time; mix well.

Toss the pasta with the cheese mixture in a large bowl. Add the chicken now, if you got it from a can. Add it later if you're using roasted chicken breast. Or you can add it now, whatever.

Fold in the Gorgonzola -- 4 ounces if you like it mild, and up to 6 ounces if you prefer the potency. Add salt (keep in mind that you will be adding bacon later), freshly ground black pepper, and cayenne pepper to taste.

Spray a large casserole dish with nonstick cooking spray, or grease with butter. Spread pasta mixture into dish; sprinkle breadcrumbs evenly over pasta. Melt the remaining 2 tablespoons of butter in the microwave and pour over breadcrumbs. Bake in the oven, uncovered, for 40 minutes, or until top has browned.

While macaroni is baking, cook the bacon; drain on a paper towel. (Adding the bacon to the dish later will maintain its delightful crispiness.) Discard most, but not all, of the bacon drippings.

Brown the mushrooms in the remaining bacon drippings over medium-low heat. Add a pinch of salt to bring out a little of the moisture, but be wary not to make them soggy. They should be browned and fragrant, but still firm. Season with freshly ground black pepper.

When the macaroni is ready, serve some up in a bowl, and top with sliced roasted chicken breast, mushrooms and crumbled bacon. Then say, "YESSS."

Is your tummy grumbling yet?

Wednesday, January 2, 2008

Icebox cookies: the hottest thing to hit your fridge this baking season.

First of all, Happy New Year! Please excuse me while I wipe the dust off my blog, and forgive my lack of updating! I know, spending time with family is no excuse. Neither is catching up on sleep.

Ah, sleep. I really do love the holidays.

Ok, enough of that. Now on to very serious business:

In case you haven't heard (and how dare you if you haven't), I must report that icebox cookies are so IN right now. And I wish they were IN my belly right now.

It's true! They are ALL the rage. Just check out today's LA Times, which features three recipes for "sophisticated versions" of what the article calls "chiller cookies": peanut butter and bittersweet chocolate, coffee-walnut and apricot butter.

The article will tell you, but in case you don't know what icebox cookies are (and how dare you if you don't), they are made by preparing the cookie dough ahead of time (a classic recipe is one that is simple with easy, but fabulous, variations), dividing them into equally-shaped logs of joy, rolling them in whatever you please (traditionally little toppings that are sweet and edible, like sprinkles), then letting them chill in the refrigerator -- or "icebox" -- and then taking them out a few hours later to slice and bake them. Unsurprisingly, they are also known as "slice and bake cookies" (please, no Pillsbury), but I like the "icebox" name much better. It gives such a retro charm, don't you think?

Anyway, the beauty of these cookies is that you can make the logs of joy ahead of time and save them in the fridge or freezer for a quick and beautiful treat later. But if you're like me, you don't have the patience and willpower to wait more than a couple hours before enjoying them.

I've indulged in and shared variations of these cookies multiple times over the past month or so (talk about hopping on the bandwagon, LA Times, yeesh), and I'm still looking forward to trying out more recipes.

Particularly, these pistachio cranberry icebox cookies were so deliciously festive at my family's Christmas party.

I find joy and satisfaction in slicing them before sticking them in the oven, too. After each slice, I excitedly proclaimed "GORGEOUS!" and showed them off proudly.


But they are gorgeous! If you look closely, you can see the flecks of cinnamon and orange zest, too. (Also, I must recognize Cha for being my lovely hand model. You are lovely. And your hand is lovely.)

I also made Carole Walter's icebox cookies, published in Great Cookies, my go-to cookbook for cookie recipes, including the marbled chocolate and cinnamon nut variations. You'll find that the "master recipe" is delicious in all its simplistic glory.

Finally, I stumbled across a recipe for Mexican chocolate icebox cookies. I'm trying these next.

Mexican Chocolate Icebox Cookies, Maida Heatter, Maida Heatter's Book of Great Chocolate Desserts

1 1/2 cups flour
3/4 cup quality Dutch-process unsweetened cocoa
3/4 teaspoons ground cinnamon
1/2 teaspoons cayenne
1/4 teaspoon salt
1/4 tsp freshly ground black pepper
1 cup sugar
1 1/2 teaspoons vanilla extract
1 egg
12 tablespoons cold unsalted butter, cut into small pieces

Whisk the flour, cocoa, cinnamon, cayenne, salt, and pepper together in a medium bowl and set aside. Put sugar, vanilla, and egg into a large bowl and beat with an electric mixer on high speed until thick and pale, about three minutes. Add butter and continue to beat on high speed until smooth, about three minutes more. Using your fingers, work flour mixture into butter mixture until dough is just combined. Divide dough in half and roll each half into a 9-inch log. Wrap each log in parchment paper, twisting ends tightly to make a uniform cylinder. Chill dough logs for at least eight hours and as long as overnight.

Preheat oven to 350 degrees F. Unwrap dough and slice each log into rounds 1/3-inch thick. Place rounds one inch apart on parchment paper-lined cookie sheets. Bake cookies until slightly puffed and tiny cracks appear on surface, about eight minutes. Transfer cookies to a rack to let cool. Makes about four dozen cookies.

Happy iceboxing!

Tuesday, December 11, 2007

Comfort food at its finest.

If you love comfort food, particularly of the American variety, hearty and delicious, made with love and lots of butter, then Paula Deen's probably your go-to food TV mama for recipes. And if you're also happening to look for a food blog that specializes in down-home cowboy grub, then look no further than The Pioneer Woman.

This weekend I made Pioneer Woman's berry cobbler, a prime example of comfort food in dessert form. The original recipe calls for only blackberries, but I used a frozen mixed berry mix with blackberries, raspberries and blueberries. So it didn't look exactly like this.


But it looked and tasted just as delicious. Moist, sugary and tart, I finished probably about a third of the cobbler in one sitting. And it is SO easy to make.

(More alterations: Instead of 1 cup self-rising flour, I used 1 cup all purpose flour + 1 1/4 teaspoons baking powder + a pinch of salt. And I threw in 1/4 teaspoon pure vanilla extract in the batter for kicks.)

Remember, comfort food recipes aren't for calorie-counting health nuts. These dishes are, more often than not, bad for you. But in such a good, good way.

Monday, December 3, 2007

Ooey-gooey bubbly cheesy baked tortellini.

Okay. It's another Giada recipe. Yes, you may have guessed that she is one of my most favorite Food Network chefs. I probably print out her recipes more often than any other chef's (second is Paula Deen).

What can I say? Her recipes are simple, delicious, hearty and often very easily adjustable (don't like arugula? Substitute spinach!). Also, they're man-pleasin' dishes. And sister pleasin'. Cousin-pleasin', too.... But not Mom-pleasin', though. She hates cheese.

Anyway, my favorites are the hot and bubbly, ooey-gooey fatty baked pasta dishes. Last weekend was my second time making Giada's cheesy baked tortellini. This time, though, I added creamy goat cheese to the sauce mixture, and served it with Parmesan crisps to boot. I sliced up some ciabatta (focaccia would work, too), slathered it with garlic butter and generously sprinkled grated Parmesan on top. Bake the slices in a toaster oven/broiler, or with the pasta 10 minutes before it's ready.

Giada and I recommend using a simple store-bought tortellini (cheese is best) paired with your favorite marinara -- this time I used a combo of roasted garlic sauce and spinach and cheese sauce.


Now I know this looks like an indistinguishable mess of gooey Italian food, but you must understand that by this time, my hunger had taken over the patience required to get a good shot. So, unless you like the look of indistinguishable piles of gooey Italian food, you'll just have to trust me. YUM.

Friday, November 30, 2007

Broccoli (oOOooh) and cheese (aaaHHhh) soup (wooooo! ow!).

Most of you probably know that although I adore the Food Network, I'm not the biggest fan of Emeril Lagasse. In fact, I find him overrated and incredibly annoying as a culinary entertainer. I cannot stand Emeril Live. Only a few minutes into the show, I am compelled to change the channel after hearing 50 "oh yah, babe"s and a billion other tiresome catchphrases. And I want to punch his audience in the collective face -- always applauding and ooh-ing and ahh-ing after Emeril slices up some zucchini, adds a pinch of cayenne pepper, or throws in some garlic. Oh yah, babe. Garlic is SOOO exotic. You add that garlic, Emeril.

(I mean, don't get me wrong -- I love garlic as much as the next gal, but come on! He uses it every show! Don't act surprised, people.)

But regardless of the obnoxious BAMs and punch-worthy audience, I have to admit one thing: Emeril's recipes are often pretty damn good. If I just pay attention to the actual dishes, I find myself wanting to cook them. And then I grimace and clench my fist.

I was recently recommended Emeril's broccoli and cheese soup. Although when I make this, I'll probably take the onions down a notch.

Tuesday, November 6, 2007

Pumpkin "butter" on fresh scones; pumpkin cookies. AKA I love Thanksgiving.

The period between Halloween and Thanksgiving is what I have (just) decided to call "Pumpkin Mania!" It's the time of the year when I indulge in pumpkin goodies and love them so much that say to myself, "Hey, I should make this anytime during the year!" But of course, that never happens. I just forget about it until next Halloween.

So, I better take full advantage of the 2007 Thanksgiving season. Here are a couple pumpkin yummies to start:

Trader Joe's recently introduced Pumpkin Butter to their stock. The label's suggestions for uses include "pastry filling, poultry glaze, ice cream topping, on toast or mixed with fat free cream cheese."

They're also perfect to spread on warm plain scones. A store-bought mix by Sticky Fingers Bakeries will do, but making them from scratch is so easy!

Boxing Day Scones, Sara Perry and Leigh Beisch, Holiday Baking
3 cups all-purpose flour
1/2 cup granulated sugar
2 1/2 teaspoons baking powder
1/2 teaspoons baking soda
3/4 teaspoons salt
3/4 cup (1 1/2 sticks) cold unsalted butter, cut into small pieces
1 cup buttermilk
Strawberry jam (in this case, pumpkin butter), for serving

1. Preheat the oven to 400 degrees. Line a baking sheet with parchment paper or grease it lightly and set aside.
2. Into a large bowl, sift together the flour, sugar, baking powder, baking soda and salt, then lightly whisk. Use a pastry blender, two knives, or your fingers to cut or work the butter into the flour mixture until it resembles fine crumbs.
3. Make a well in the center of the flour-butter mixture, and add the buttermilk all at once. Stir the mixture until the dough pulls away from the sides of the bowl. Using lightly floured hands, gather the dough into a soft ball and turn it out onto a lightly floured work surface. Divide into 4 parts and pat each one into a 3/4 inch thick circle. Cut each circle into 4 or 6 wedges.
4. Transfer the wedges to the prepared baking sheet, and bake in the center of the oven until the scones rise and turn golden brown, 12 to 15 minutes. Remove and cool for 5 minutes on the baking sheet, then transfer to a rack. Serve warm, split and spread with pumpkin butter.

These are best eaten freshly baked of course, but if you store them in an airtight container and pop them in a 325-degree oven later for about 5 minutes, they're almost as good as new!


Ah yes, it's now time for the pumpkin cookie. There are basically two kinds: iced/frosted and chunky. I used to fancy the chunky kind, chock full of dried cranberries and pecans or walnuts. There was a recipe I used to have back in seventh and eighth grade -- as a library aide for my middle school, I had a ton of spare time on my hands and explored the stash in the storage area and found a kids' holiday cookbook with a recipe for the best pumpkin cookies I've ever tasted -- perfectly spiced, with a balanced pumpkin flavor and great texture, more cookie instead of cakey.

I wish I could share that recipe, but unfortunately, I lost it and can't remember what the book was to find it again. Even today I haven't been able to find a suitable replacement for chunky pumpkin cookies, but I was recently recommended a killer recipe for the kind slathered in frosting -- browned butter frosting, to be exact. Courtesy good ol' Betty Crocker.


Perhaps later this month: pumpkin cheesecake..?

Monday, November 5, 2007

Red velvet scandal.

The first time I had a red velvet cupcake, I wondered where the red color came from. Blood red strawberries? Overripe raspberries? I remember thinking. And then I looked up a recipe.

Oh, it's just food coloring. Lots and lots of red food coloring.

This didn't wig me out, oddly enough. I continued happily indulging in red velvet cupcakes whenever I got the chance. And finally, I decided to try making my own.

Now this recipe, by Elisa Strauss in The Confetti Cakes Cookbook, calls for a whopping 6 tablespoons of red food coloring for a 3-layer, 9-inch cake, equivalent to about 3 1/2 dozen cupcakes.

While I was collecting the ingredients, I pictured myself buying a bunch of those tiny little food coloring bottles that are readily available in any grocery store. Then it came to me -- a cake supply store, duh.

I arrived at Orange Novelty Cake Decorating and asked for a bottle of red food coloring.

"Do you want the airbrush food coloring or the gel paste?"
"Um.. what's best for red velvet cake?"
"Probably the gel paste, since it's more concentrated."
"Okay, I'll take that, then."

I should have also asked, "What is the gel paste to liquid food coloring ratio?"

(.... Yeah, I'm sure any pastry chef or red velvet cake veteran reading this can imagine what happened next.)

So later when I started making the cake batter, and when it came time to add the red, I thought, Okay, since the recipe calls for 6 tablespoons of liquid food coloring, 3 tablespoons of this stuff will probably be good.

I started with a single tablespoon. And then another.

Hmm. This batter doesn't look dark red enough.

I hate it when red velvet cupcakes are pink. They're not called PINK velvet! I like dark red velvet cupcakes. So I start to squirt more food gel in, a little at a time. When I decided to stop, I still wasn't satisfied with the color and felt that it was too light. But by that time, I was becoming disturbed at how much artificiality was going into these cupcakes.

(My pastry chef cousin later told me as I was telling her this story, "Yeah, the baked cake is always much darker than the batter." That would have been nice to know before I had started dumping gobs of red into my batter.)

Anyway, so I baked the cupcakes and was delighted to find that the cakes were moist, sweet, and a deep red color. It was one of the most delicious cakes I had ever made and tasted.

But as time went on, I became increasingly worrisome: What are the health disadvantages to artificial food dye?? My paranoia prevented me from thoroughly enjoying my cupcakes, which is very sad to me.

Later I found out that I used something like 6 times the amount of red food gel that I actually needed. Needless to say, I've had my fill of red velvet for probably the next year, and next time I will be making just "velvet cupcakes." Without the "red." Because the red is only used to dye the cake and not add to the quality of it, the cake will still be luscious and tasty.

But here's the now infamous recipe:

Red Velvet Cake, Elisa Strauss, The Confetti Cakes Cookbook
3 1/2 cups cake flour
1/2 cup unsweetened cocoa (not Dutch-processed)
1 1/2 teaspoons salt
2 cups canola oil
2 1/4 cups granulated sugar
3 large eggs
6 tablespoons (or 3 ounces) LIQUID red food coloring OR start with 1 teaspoon red gel paste at a time
1 1/2 teaspoons vanilla
1 1/2 cups buttermilk
2 teaspoons baking soda
2 1/2 teaspoons white vinegar

1. Preheat oven to 350 degrees. Whisk cake flour, cocoa and salt in a bowl.
2. Place oil and sugar in a bowl of an electric mixer and beat at medium speed until well-blended. Beat in eggs one at a time. With machine on low, very slowly add red food coloring. Add vanilla. Add flour mixture alternately with buttermilk in two patches. Scrape down bowl and beat just long enough to combine.
3. Place baking soda in a small dish, stir in vinegar and add to batter with machine running. Beat for 10 seconds.
4. Divide batter among 3 round 9-inch layer cake pans, or fill muffin tins 2/3 of the way full. Bake until a cake tester comes out clean, 40 to 45 minutes for layer cake or 12-15 minutes for cupcakes. Transfer to cooling rack and let cool completely before frosting.

After going on and on about the cake, I haven't even mentioned the icing. This delectable marry of whipped cream folded into mascarpone and cream cheese is what saved the day. Thanks to the New York Times (Feb. 14, 2007) for coming up with this killer combo. I recommend using an electric hand mixer to whip the cream, and a food processor to combine the other ingredients.

Red Velvet Cake Icing, John Doherty with John Harrisson, The Waldorf-Astoria Cookbook

2 cups heavy cream, cold
12 ounces cream cheese, at room temperature
12 ounces mascarpone
1/2 teaspoon vanilla
1 1/2 cups confectioners' sugar, sifted

1. Softly whip cream by hand, in electric mixer or in food processor. Cover in bowl and refrigerate.
2. Blend cream cheese and mascarpone in food processor or electric mixer until smooth. Add vanilla, pulse briefly, and add confectioner's sugar. Blend well.
3. Transfer cream cheese mixture to bowl; fold in whipped cream. Refrigerate until needed.

And there she is. Naked, violated, and bleeding.


And yes. This baby stained. Everywhere.

* * *
Orange Novelty Cake Decorating
3625 W. Macarthur Blvd. #305
Santa Ana 92704
714.556.4661

Tuesday, October 23, 2007

Hooray for Italian wedding soup and fried ravioli!

Okay well, I didn't make morning glory muffins this weekend, but I cooked a fabulous dinner (if I do say so myself) consisting of Italian wedding soup and fried ravioli (both recipes courtesy Giada De Laurentis and Everyday Italian).

First up: Fried ravioli.


I hold a fairly strong belief that most everything is better fried. Why else do you think I love fairs? Fried Oreos, fried Snickers (mmm.. similar in taste to the Indonesian martabak), fried Twinkies, fried avocado, fried Coke, even -- which is what I should have gotten at the L.A. County Fair instead of that Krispy Kreme chicken sandwich (blech.. but more on that another time perhaps).

So when I tried this insanely simple recipe, I began to wonder why we hardly ever see fried ravioli on restaurant and fast food menus, or at least at fairs. I mean, they're incredibly easy to make and they're like Italian fries -- with marinara posing as ketchup.


* * *

Italian wedding soup: Another fabulous recipe. The meatballs are the star -- a mixture of beef and pork with onion, garlic, fresh Italian parsley and Parmigiano Reggiano? What's not to love? Just make sure you don't go blind from grating the onion -- ouch!

Also, I like pasta in my soup, so I boiled a cup of orzo (a little underdone) and added it right near the end.

Monday, October 15, 2007

"What is a morning glory muffin?"

Disappointingly, I didn't know the answer. But it does sound intriguing. In a healthy, fruity, everything-but-the-kitchen-sink kind of way.

Morning glory muffins, from AllRecipes.com. I love this site.

I think it's a must-try for breakfast this weekend. Stay tuned...